Centos 7安装lnmp、zabbix
1、Yum安装Nginx
1)配置Centos 7 Nginx Yum源仓库
[root@localhost ~]# rpm -Uvh http://nginx.org/packages/centos/7/noarch/RPMS/nginx-release-centos-7-0.el7.ngx.noarch.rpm
Retrieving http://nginx.org/packages/centos/7/noarch/RPMS/nginx-release-centos-7-0.el7.ngx.noarch.rpm
warning: /var/tmp/rpm-tmp.PiXlZn: Header V4 RSA/SHA1 Signature, key ID 7bd9bf62: NOKEY
Preparing… ################################# [100%]
Updating / installing…
1:nginx-release-centos-7-0.el7.ngx ################################# [100%]
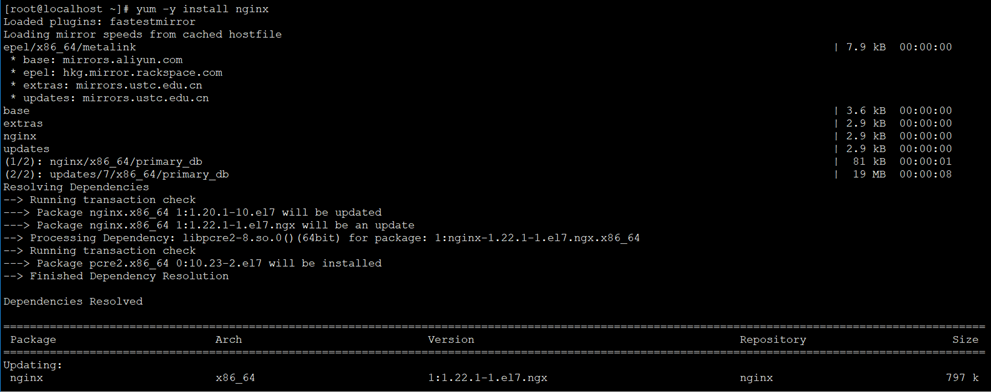
2)安装Nginx
[root@localhost ~]# yum -y install nginx
3)启动Nginx
[root@localhost ~]# systemctl start nginx
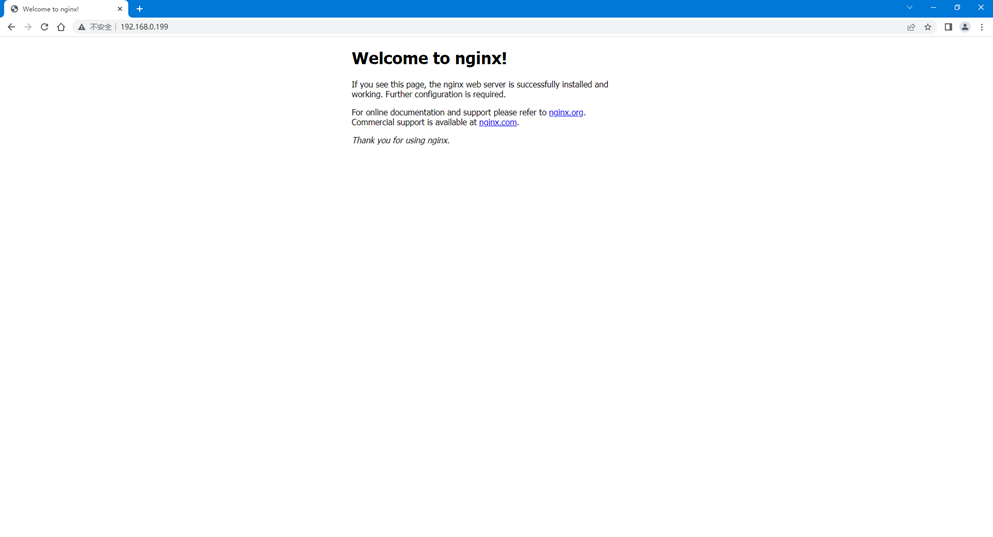
4)访问Nginx
5)Nginx默认地址和配置
/etc/nginx/nginx.conf # Yum安装Nginx默认主配置文件
/usr/share/nginx/html # Nginx默认存放目录
/usr/share/nginx/html/index.html # Nginx默认主页路径
6)常用基本操作
1、启动Nginx
[root@localhost ~]# systemctl start nginx
2、停止Nginx
[root@localhost ~]# systemctl stop nginx
3、重载Nginx
[root@localhost ~]# systemctl reload nginx
4、重启Nginx
[root@localhost ~]# systemctl restart nginx
5、查询Nginx运行状态
[root@localhost ~]# systemctl status nginx
6、查询Nginx进程
[root@localhost ~]# ps -ef |grep nginx
7、查询Nginx监听端口
[root@localhost ~]# netstat -lntup |grep nginx
8、卸载Nginx
[root@localhost ~]# yum -y remove nginx
9、RPM方式安装升级指定版本Nginx
[root@localhost ~]# rpm -Uvh http://nginx.org/packages/centos/7/x86_64/RPMS/nginx-1.22.0-1.el7.ngx.x86_64.rpm
2、Yum安装MySQL
1)配置清华大学Yum源
[root@localhost ~]# vim /etc/yum.repos.d/mysql-community.repo
[mysql-connectors-community]name=MySQL Connectors Communitybaseurl=https://mirrors.tuna.tsinghua.edu.cn/mysql/yum/mysql-connectors-community-el7-://mirrors.tuna.tsinghua.edu.cn/mysql/yum/mysql-connectors-community-el7-$basearch/enabled=1gpgcheck=1gpgkey=https://repo.mysql.com/RPM-GPG-KEY-mysql[mysql-tools-community]name=MySQL Tools Communitybaseurl=https://mirrors.tuna.tsinghua.edu.cn/mysql/yum/mysql-tools-community-el7-$basearch/enabled=1gpgcheck=1gpgkey=https://repo.mysql.com/RPM-GPG-KEY-mysql[mysql-8.0-community]name=MySQL 8.0 Community Serverbaseurl=https://mirrors.tuna.tsinghua.edu.cn/mysql/yum/mysql-8.0-community-el7-$ba
2)安装MySQL-8.0
[root@localhost ~]# yum -y install mysql-community-server
3)启动MySQL
[root@localhost ~]# systemctl start mysqld
4)登录MySQL
1、查看初始化后生成的密码
[root@localhost ~]# grep ‘password’ /var/log/mysqld.log
2023-03-25T09:43:00.827356Z 6 [Note] [MY-010454] [Server] A temporary password is generated for root@localhost: _nbwC%gx3(DK
2、登录MySQL
[root@localhost ~]# mysql -uroot -p’_nbwC%gx3(DK’
mysql: [Warning] Using a password on the command line interface can be insecure.
Welcome to the MySQL monitor. Commands end with ; or \g.
Your MySQL connection id is 9
Server version: 8.0.32
Copyright (c) 2000, 2023, Oracle and/or its affiliates.
Oracle is a registered trademark of Oracle Corporation and/or its
affiliates. Other names may be trademarks of their respective
owners.
Type ‘help;’ or ‘\h’ for help. Type ‘\c’ to clear the current input statement.
# 初始化后需重置密码才能执行sql
mysql> ALTER user ‘root’@’localhost’ IDENTIFIED BY ‘Aa123456@!’;
Query OK, 0 rows affected (0.00 sec)
mysql> flush privileges;
Query OK, 0 rows affected (0.00 sec)
mysql> exit
# 验证修改后的密码是否正常登陆
[root@localhost ~]# mysql -uroot -p’Aa123456@!’
mysql: [Warning] Using a password on the command line interface can be insecure.
Welcome to the MySQL monitor. Commands end with ; or \g.
Your MySQL connection id is 9
Server version: 8.0.32 MySQL Community Server – GPL
Copyright (c) 2000, 2023, Oracle and/or its affiliates.
Oracle is a registered trademark of Oracle Corporation and/or its
affiliates. Other names may be trademarks of their respective
owners.
Type ‘help;’ or ‘\h’ for help. Type ‘\c’ to clear the current input statement.
mysql> select version();
+———–+
| version()|
+———–+
| 8.0.32 |
+———–+
1 row in set (0.00 sec)
mysql> exit
3、Yum安装PHP
1)安装remi扩展源
remi源是Remi repository是包含最新版本PHP和MySQL包的Linux源,由Remi 提供维护。有这个源之后,使用YUM安装或更新PHP、MySQL、phpMyAdmin等服务器相关程序的时候就非常方便了。
[root@localhost ~]# yum -y install epel-release
[root@localhost ~]# yum -y install http://rpms.remirepo.net/enterprise/remi-release-6.rpm
2)安装Yum管理工具
[root@localhost ~]# yum -y install yum-utils
3)安装PHP
[root@localhost ~]# yum -y install php73-php-cli php73-php-common php73-php-devel php73-php-embedded php73-php-fpm php73-php-gd php73-php-mbstring php73-php-mysqlnd php73-php-pdo php73-php-opcache php73-php-xml php73-php-soap php73-php-bcmath
4)查看是否安装成功及php配置文件以及对应目录
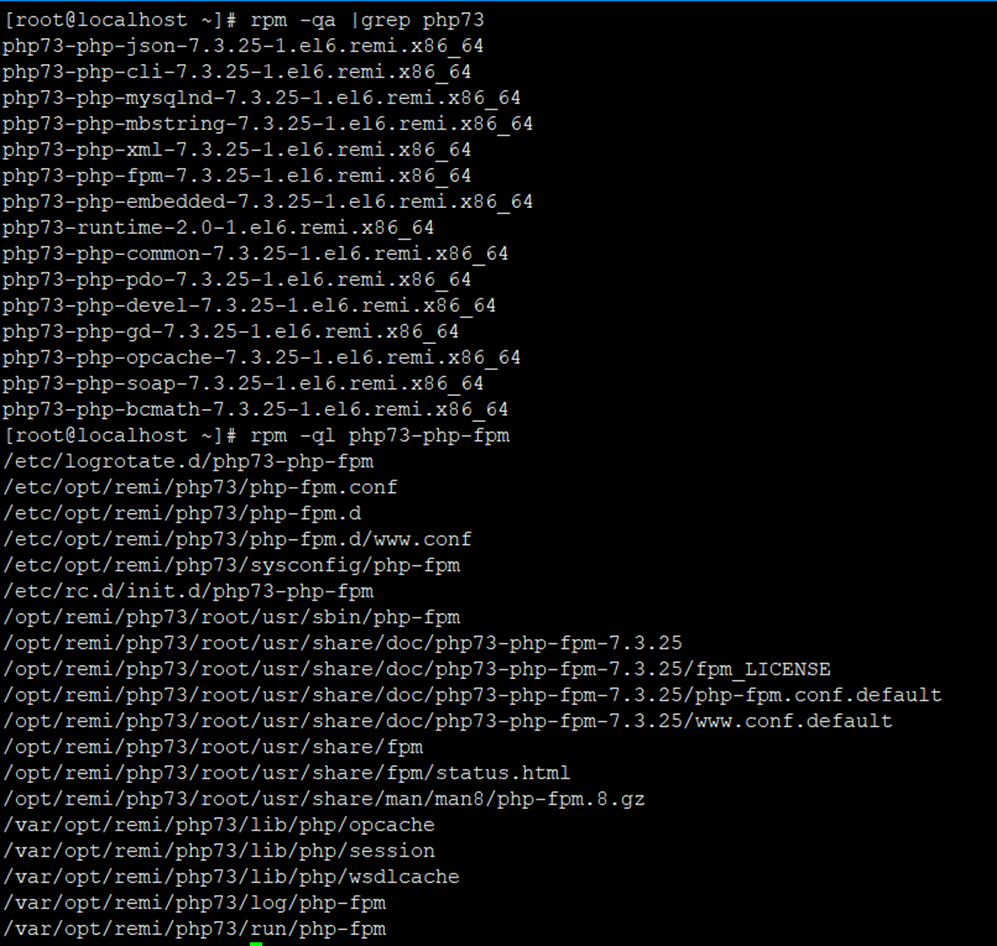
[root@localhost ~]# rpm -qa |grep php73
[root@localhost ~]# rpm -ql php73-php-fpm
5)建立软连接
[root@localhost ~]# ln -sf /opt/remi/php73/root/usr/bin/php* /usr/local/bin
6)查看PHP版本
[root@localhost ~]# php -v
PHP 7.3.25 (cli) (built: Nov 24 2020 14:22:04) ( NTS )
Copyright (c) 1997-2018 The PHP Group
Zend Engine v3.3.25, Copyright (c) 1998-2018 Zend Technologies
with Zend OPcache v7.3.25, Copyright (c) 1999-2018, by Zend Technologies
7)启动PHP-FPM
[root@localhost ~]# service php73-php-fpm start
8)设置开机自启动
[root@localhost ~]# chkconfig php73-php-fpm on
9)常用基本操作
1、启动PHP
[root@localhost ~]# service php73-php-fpm start
2、停止PHP
[root@localhost ~]# service php73-php-fpm stop
3、重载PHP
[root@localhost ~]# service php73-php-fpm reload
4、重启PHP
[root@localhost ~]# service php73-php-fpm restart
5、查询PHP运行状态
[root@localhost ~]# service php73-php-fpm status
6、查询PHP进程
[root@localhost ~]# ps -ef |grep php-fpm
7、查询PHP监听端口
[root@localhost ~]# netstat -lntup |grep php-fpm
8、卸载PHP
[root@localhost ~]# yum -y remove php73*
4、源码安装Zabbix 6.0 LTS
1)安装依赖包
[root@localhost ~]# yum -y install wget net-snmp net-snmp-devel perl-DBI curl curl-devel libevent libevent-devel gcc gcc-c++ mysql-devel pcre pcre-devel OpenIPMI-devel libcurl-devel libxml2-devel
2)下载Zabbix软件包
[root@localhost ~]# wget https://cdn.zabbix.com/zabbix/sources/stable/6.0/zabbix-6.0.14.tar.gz
3)解压
[root@localhost ~]# tar xf zabbix-6.0.14.tar.gz
4)预编译
[root@localhost ~]# cd zabbix-6.0.14
# 指定C99编译(gcc默认使用的是C89的标准,而C89的标准不支持在for中定义循环变量,不指定编译报错解决起来你会疯)
[root@localhost zabbix-6.0.14]# export CFLAGS=”-std=gnu99″
[root@localhost zabbix-6.0.14]# ./configure –prefix=/usr/local/zabbix –enable-server –enable-agent –with-mysql –enable-ipv6 –with-net-snmp –with-libcurl –with-libxml2 –with-openipmi
5)安装Zabbix
[root@localhost zabbix-6.0.14]# make install
6)配置Zabbix
1、备份配置文件
[root@localhost zabbix-6.0.14]# cp /usr/local/zabbix/etc/zabbix_server.conf{,_bak}
[root@localhost zabbix-6.0.14]# cp /usr/local/zabbix/etc/zabbix_agentd.conf{,_bak}
2、创建软链接
[root@localhost zabbix-6.0.14]# ln -sf /usr/local/zabbix/sbin/zabbix_* /usr/local/sbin
3、拷贝Web到Nginx发布目录
[root@localhost zabbix-6.0.14]# cp -a ui /usr/share/nginx/html/zabbix
4、授权
[root@localhost zabbix-6.0.14]# chown -R nginx.nginx /usr/share/nginx/html/zabbix
5、配置Zabbix Server
[root@localhost zabbix-6.0.14]# vim /usr/local/zabbix/etc/zabbix_server.conf
LogFile=/tmp/zabbix_server.logPidFile=/tmp/zabbix_server.pidDBHost=localhostDBName=zabbixDBUser=zabbixDBPassword=Aa123456@Timeout=30LogSlowQueries=3000
6、配置Zabbix Agentd
[root@localhost zabbix-6.0.14]# vim /usr/local/zabbix/etc/zabbix_agentd.conf
LogFile=/tmp/zabbix_agentd.logServer=localhostServerActive=localhostHostname=192.168.0.195AllowKey=system.run[*]UnsafeUserParameters=1LogFileSize=10Timeout=30
7、配置系统服务
[root@localhost zabbix-6.0.14]# cp misc/init.d/tru64/zabbix_* /etc/init.d
[root@localhost zabbix-6.0.14]# chmod +x /etc/init.d/zabbix_*
8、创建Zabbix用户
[root@localhost zabbix-6.0.14]# useradd -s /sbin/nologin zabbix
9、创建Zabbix数据库
[root@localhost zabbix-6.0.14]# mysql -hlocalhost -uroot -p’Aa123456@!’ 2>/dev/null -e “create database zabbix character set utf8 collate utf8_bin;”
[root@localhost zabbix-6.0.14]# mysql -hlocalhost -uroot -p’Aa123456@!’ 2>/dev/null -e “create user zabbix@’localhost’ identified by ‘Aa123456@’;”
[root@localhost zabbix-6.0.14]# mysql -hlocalhost -uroot -p’Aa123456@!’ 2>/dev/null -e “grant all on zabbix.* to zabbix@’localhost’;”
[root@localhost zabbix-6.0.14]# mysql -hlocalhost -uroot -p’Aa123456@!’ 2>/dev/null -e “flush privileges;”
10、导入Zabbix数据和创建表
[root@localhost zabbix-6.0.14]# mysql -hlocalhost -uzabbix -pAa123456@ 2>/dev/null zabbix < database/mysql/schema.sql
[root@localhost zabbix-6.0.14]# mysql -hlocalhost -uzabbix -pAa123456@ 2>/dev/null zabbix < database/mysql/images.sql
[root@localhost zabbix-6.0.14]# mysql -hlocalhost -uzabbix -pAa123456@ 2>/dev/null zabbix < database/mysql/data.sql
11、启动Zabbix Server和Zabbix Agentd
[root@localhost zabbix-6.0.14]# /etc/init.d/zabbix_server start
Zabbix server started.
[root@localhost zabbix-6.0.14]# /etc/init.d/zabbix_agentd start
Zabbix agent started.
12、查看Zabbix Server和Zabbix Agentd监听端口
[root@localhost zabbix-6.0.14]# netstat -lntup |egrep “10050|10051”
13、配置开机自启动
[root@localhost zabbix-6.0.14]# sed -i ‘/#!\/bin\/sh/a#chkconfig: – 30 90’ /etc/init.d/zabbix_server
[root@localhost zabbix-6.0.14]# sed -i ‘/#!\/bin\/sh/a#description: Zabbix Server’ /etc/init.d/zabbix_server
[root@localhost zabbix-6.0.14]# chkconfig –add zabbix_server
[root@localhost zabbix-6.0.14]# chkconfig zabbix_server on
[root@localhost zabbix-6.0.14]# sed -i ‘/#!\/bin\/sh/a#chkconfig: – 40 95’ /etc/init.d/zabbix_agentd
[root@localhost zabbix-6.0.14]# sed -i ‘/#!\/bin\/sh/a#description: Zabbix Agentd’ /etc/init.d/zabbix_agentd
[root@localhost zabbix-6.0.14]# chkconfig –add zabbix_agentd
[root@localhost zabbix-6.0.14]# chkconfig zabbix_agentd on
7)配置nginx.conf
[root@localhost ~]# vim /etc/nginx/nginx.conf
user nginx nginx; worker_processes auto; pid /var/run/nginx.pid;events { use epoll; worker_connections 10240; multi_accept on; }http { include mime.types; default_type application/octet-stream; log_format main ‘$remote_addr – $remote_user [$time_local] “$request” ‘ ‘$status $body_bytes_sent “$http_referer” ‘ ‘”$http_user_agent” “$http_x_forwarded_for”‘; access_log /var/log/nginx/access.log main; error_log /var/log/nginx/error.log warn; sendfile on; tcp_nopush on; keepalive_timeout 120; tcp_nodelay on; server_tokens off; gzip on; gzip_min_length 1k; gzip_buffers 4 64k; gzip_http_version 1.1; gzip_comp_level 4; gzip_types text/plain application/x-javascript text/css application/xml; gzip_vary on; client_max_body_size 10m; client_body_buffer_size 128k; proxy_connect_timeout 90; proxy_send_timeout 90; proxy_buffer_size 4k; proxy_buffers 4 32k; proxy_busy_buffers_size 64k; large_client_header_buffers 4 4k; client_header_buffer_size 4k; open_file_cache_valid 30s; open_file_cache_min_uses 1;server { listen 80; server_name localhost; location / { root /usr/share/nginx/html/zabbix; index index.php index.html index.htm; } location ~* \.php$ { root /usr/share/nginx/html/zabbix; fastcgi_connect_timeout 300s; fastcgi_send_timeout 300s; fastcgi_read_timeout 300s; fastcgi_buffer_size 64k; fastcgi_buffers 4 64k; fastcgi_busy_buffers_size 128k; fastcgi_temp_file_write_size 256k; fastcgi_pass 127.0.0.1:9000; fastcgi_index index.php; fastcgi_param SCRIPT_FILENAME $document_root$fastcgi_script_name; include fastcgi_params; } }}
8)重载Nginx
[root@localhost zabbix-6.0.14]# service nginx reload
9)配置php.ini
[root@localhost zabbix-6.0.14]# sed -i ‘s/post_max_size = 8M/post_max_size = 16M/’ /etc/opt/remi/php73/php.ini
[root@localhost zabbix-6.0.14]# sed -i ‘s/max_execution_time = 30/max_execution_time = 300/’ /etc/opt/remi/php73/php.ini
[root@localhost zabbix-6.0.14]# sed -i ‘s/max_input_time = 60/max_input_time = 300/’ /etc/opt/remi/php73/php.ini
[root@localhost zabbix-6.0.14]# sed -i ‘s#;date.timezone =#date.timezone = Asia/Shanghai#’ /etc/opt/remi/php73/php.ini
[root@localhost zabbix-6.0.14]# sed -i ‘s/apache/nginx/g’ /etc/opt/remi/php73/php-fpm.d/www.conf
10)重载php-fpm
[root@localhost zabbix-6.0.14]# service php73-php-fpm reload
11)Zabbix安装配置
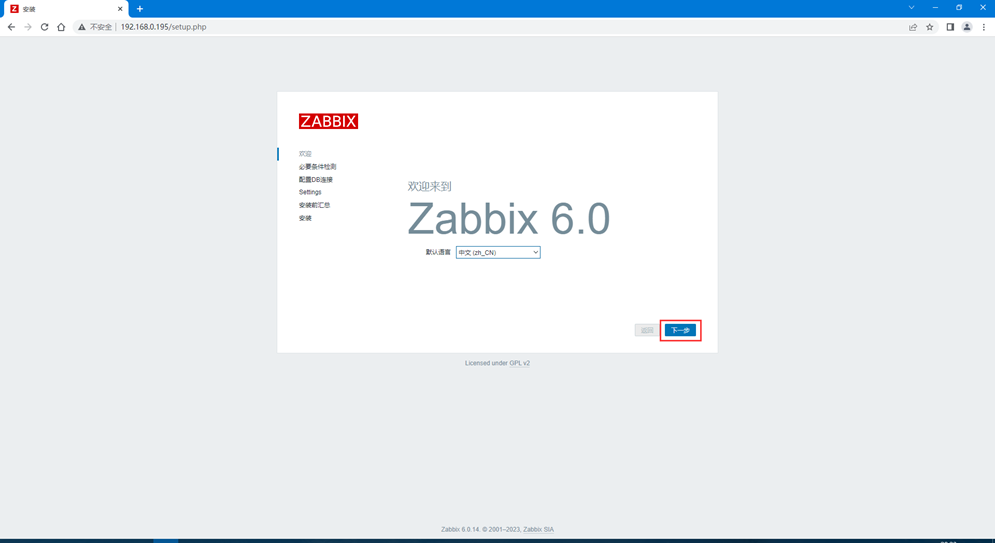
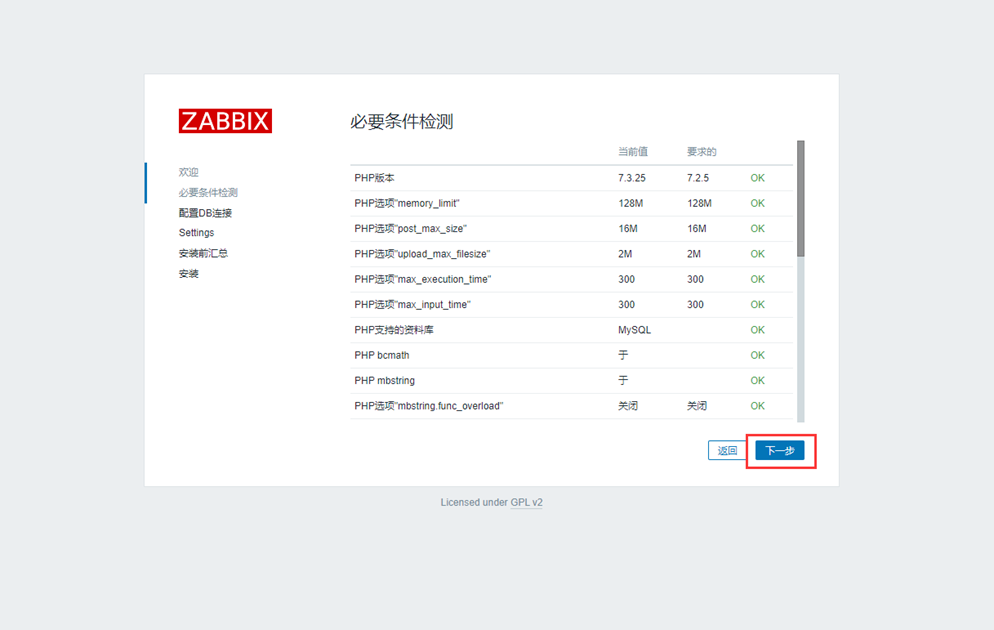
1、浏览器访问:http://192.168.0.195/,如下图所示

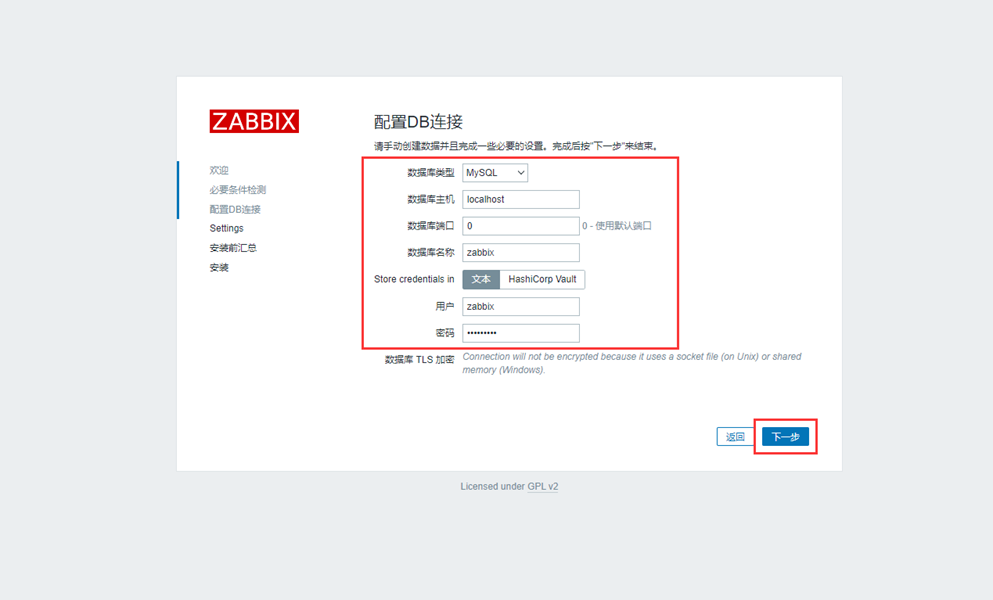
2、填写数据库主机、数据库端口、数据库名、用户名、密码
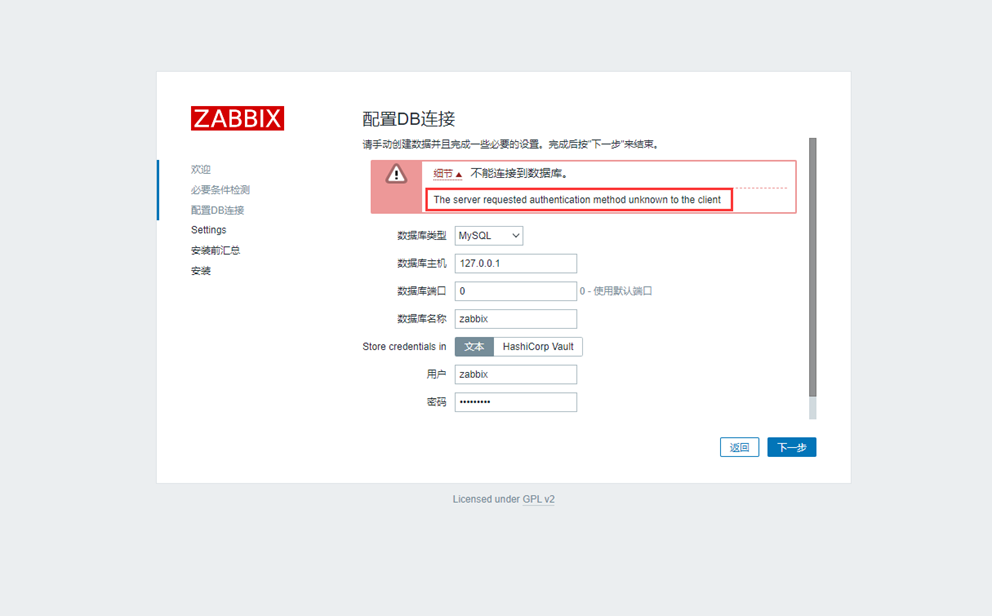
原因:MySQL 8.0升级了密码的验证方式caching_sha2_password,之前一直是mysql_native_password方式。
[root@localhost zabbix-6.0.14]# mysql -uroot -p’Aa123456@!’ 2>/dev/null -e “alter user zabbix@’localhost’ identified with mysql_native_password BY ‘Aa123456@’;”
[root@localhost zabbix-6.0.14]# mysql -uroot -p’Aa123456@!’ 2>/dev/null -e “flush privileges;”
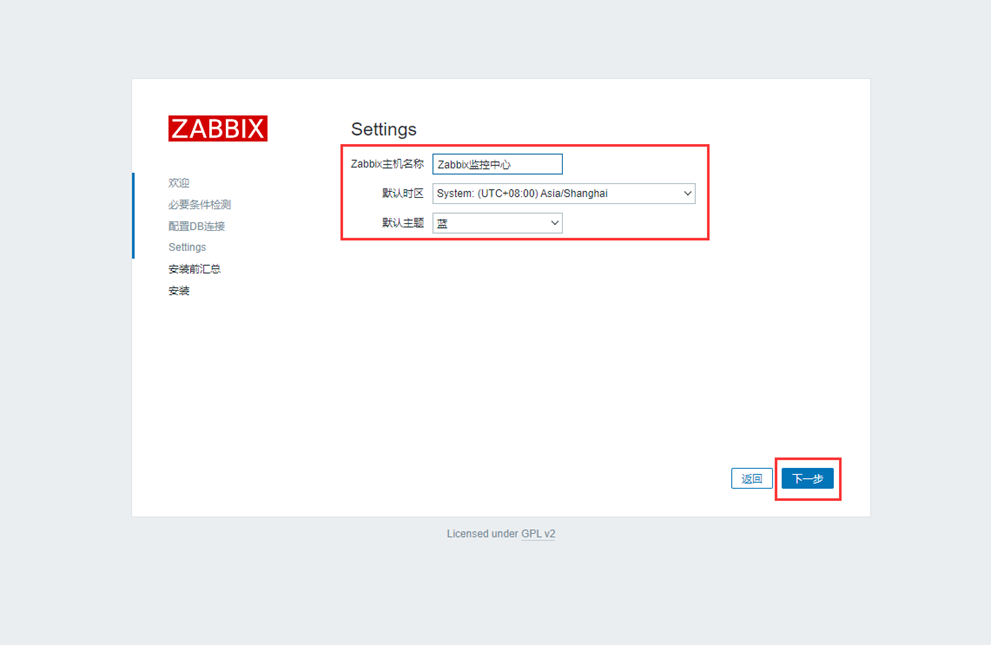
3、填写Zabbix主机名称
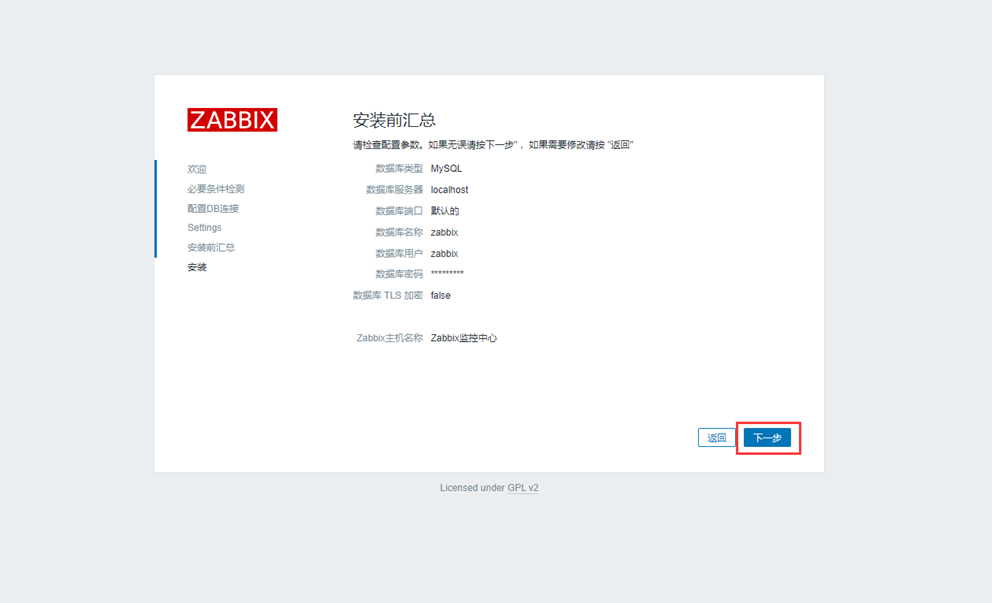
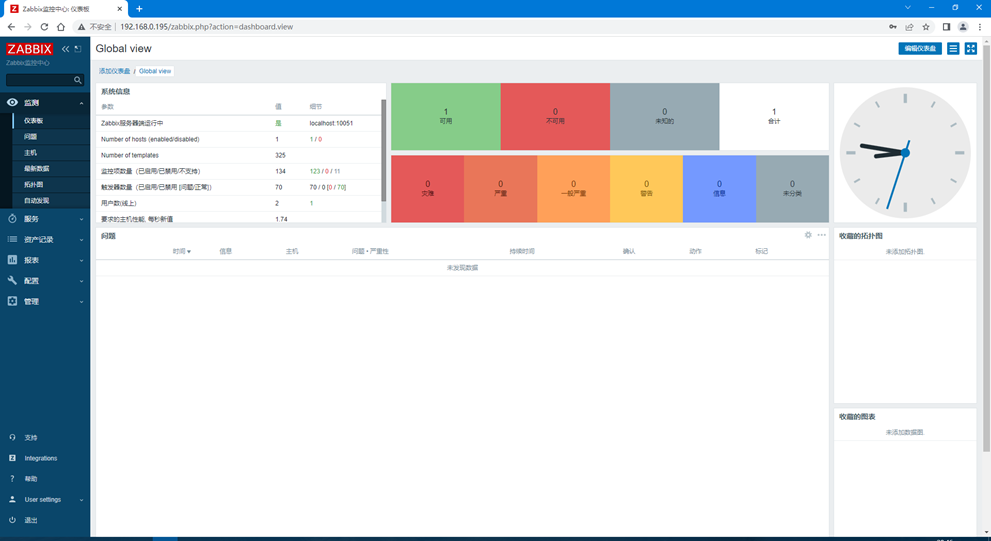
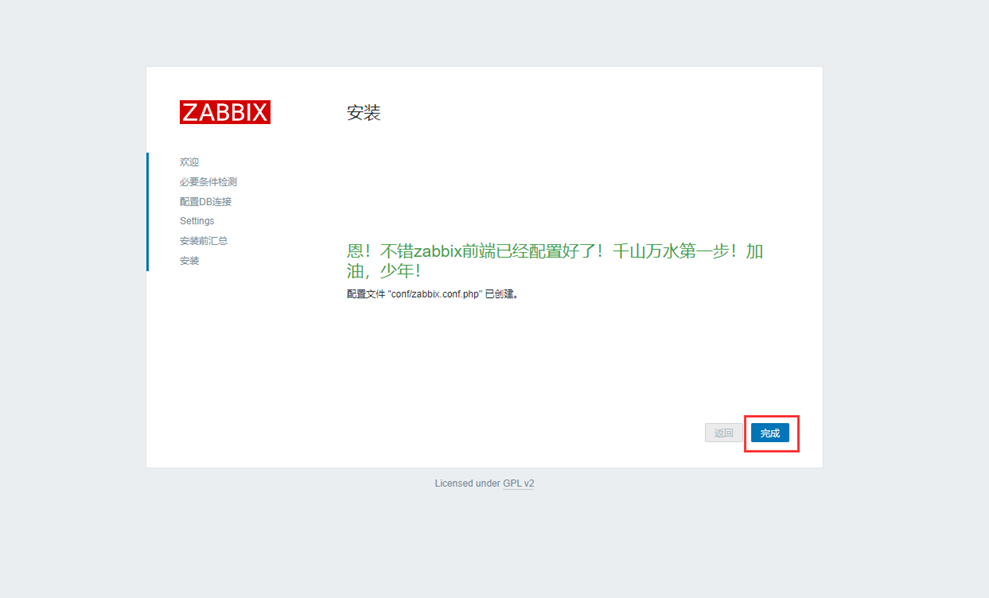
4、安装完成
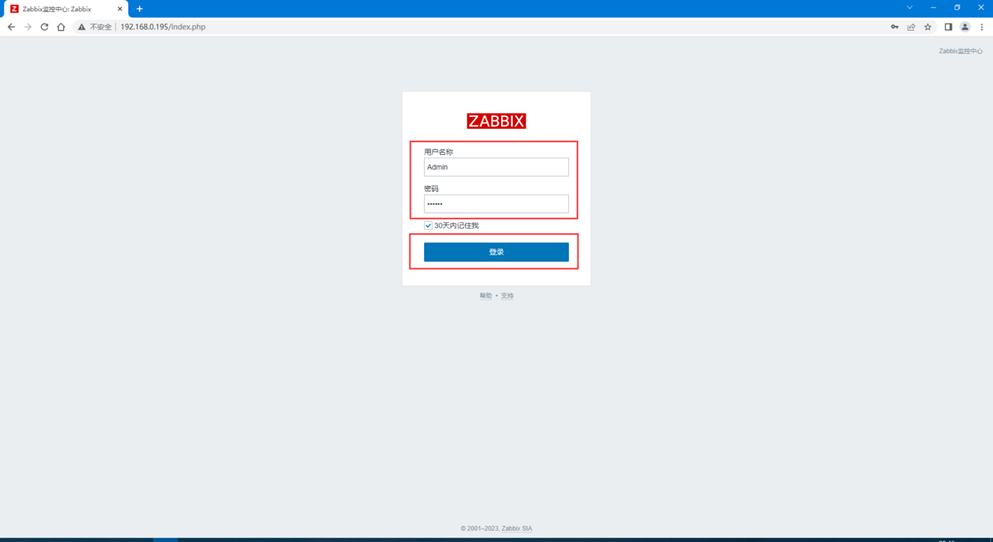
5、登录Zabbix
# 默认用户名:Admin、密码:zabbix,如下图所示